If you want to build a website with WordPress, there are some tricks that you can follow to make the process easier (and more enjoyable!). Building your own website is an excellent option if you are just starting a business. Using a web designer can cost thousands of dollars, and it is not an investment that many people can undertake as they are just getting started.
It may sound daunting, but don’t dismiss a DIY website until you get all your facts. Building your own site is easier than you think! In this article I will talk about my experience building websites using WordPress and give you a few tips to get you started. Read on to find out more!
Disclaimer: This post may contain affiliate links. This means, I get a commission if you purchase through my links, at no cost to you.
How do I build a website?
This is one of the most common questions I get asked from friends and family. Most people know that it is possible to build a website with WordPress for free, but have no idea how to go about it.
It is common for people to start researching about what it takes to start a website, get a bit overwhelmed, and give up. Doing an online search will bring back millions of results, and it is hard to decide whose advice to follow.
You may have already spent hours researching the steps to starting a website before you found this article, but don’t give up just yet! There are tricks that you can use to make the job easier.
Does my business need a website?
The short answer is, yes, of course! You may already be running your business without an online presence, but building a website will open a new world of opportunities. It will give you the chance to reach more potential customers and increase conversions.
Nowadays, technology-savvy customers do research before they make a purchase or hire a service, so being online is a must.
A website is a must for businesses of any size in New Zealand. It is a way to showcase yourself to the world. An opportunity to establish who you are and what makes you special.
Website building for beginners
Luckily, it is easy to build a website with WordPress these days. There are several user-friendly web-builders out there that allow those with no technical background to build a website.
I have personally built several websites using WordPress (including this one) without any previous web building experience.
Even if I must admit that I was a bit sceptical at first, I was surprised by how easy and rewarding the building process was. If I could do it, so can you! You just need a bit of patience and determination to learn how to do it. As with any other skill that you learn, it will take a bit of trial an error, but it is a lot easier than it sounds. I promise! You just need to give it a go.
How to build a website with WordPress in 5 steps
DOWNLOAD: Want the short version? If you don’t want to read the full article grab this PDF Guide and simply follow the clickable links.
Using WordPress to create your website
Like I said before, in this blog post I am talking about my personal experience building websites with WordPress. I am not a web developer or web designer so I can only talk about what I’ve used and worked for me.
The websites that I’ve built using WordPress have been fairly simple (like this one). If you need a more advanced website with complex functionalities it is probably a good idea to consult a web designer from the get go.
Step 1- Organise the technical foundation of your site
Before you start building your site, you need to organise the technical foundations of your site.
Don’t panic, this may sound a bit intimidating, but it is very easy to organise! To get your website up and running you need a few things:
- A domain: this is your url
- Web hosting: a company that provides your with the technology and services so that your website is displayed online
- A content management system: which is the system that allows you to build your website, in my case I use WordPress.
WordPress is one of the most popular content management systems out there. I find it easy to use and it gives you the opportunity to scale your website as you grow. I will not cover any of the other website builders here, as I want to to stick to what I know and use daily.
Choose your package
There are heaps of options out there to get all the above organised. Many companies offer an all-in-one package that allows you to buy the domain, organise web hosting and install WordPress all at the same time. For example, below is a package from Bluehost
I have included some of the most popular hosting options below.
Check out the links for step-by-step instructions on how to get their packages organised. Have your credit card ready and you can have it all set up in a few minutes.
Step 2 – Make your site secure
As you are setting up your website, it is recommended that you choose an option that comes with a SSL Certificate (you can do this easily as you are setting up web hosting). This will ensure the safety and privacy of the data going to and from your site.
You can read more about SSL Certificates at the Bluehost blog.
Step 3 – Install Elementor
As we have established, building your own website is not as scary as it sounds. I have built several websites on WordPress. I am not a web designer but have an eye for design and thoroughly enjoy the design process. I love being able to have a play with different options to see what works and what doesn’t.
Several WordPress builders make it super easy to do things yourself. I use and LOVE Elementor!
This system is a life-saver. I find it very easy to use, with an awesome drag and drop system that is very intuitive. It offers a free and a Pro version. The free version is more than enough to design a really beautiful starter website.
- You can read more about building a website using Elementor here.
Step 4 -Choose a template
The best part about building a website using WordPress is that you don’t need to start a website from scratch. You can get ready-made templates that make it possible for those with no technical background (like me!) to build a professionally looking website in just a few hours.
Elementor templates
Elementor offers a range of pre-made templates, both free and at a cost.
- You can check out their templates here.
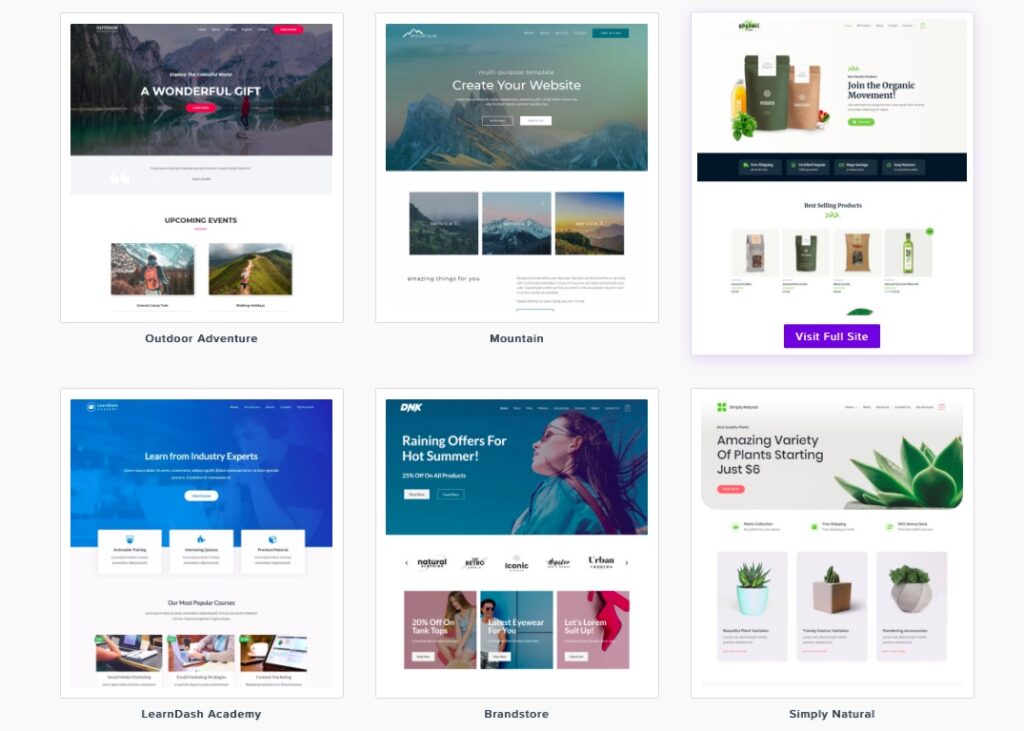
This is a snapshot of what Elementor templates look like:

Astra Starter Templates
Another option is to check the Astra Starter Templates which can be customised using Elementor. They are amazing! They offer a feature where you can make your site look exactly like a demo site in just a few clicks. By doing this you can easily create a professional-looking website which you can then customise to make your own.
- They have a range of free and paid templates, which you can check here.
- For step by step instructions on how to build a website using WordPress, Elementor, and an Astra template, go here.
This is a snapshot of what Astra templates look like:
Bluchic Templates
If you like my website, you should check out Bluchic.
I built my website using one of their paid templates, and I am really happy I made that call!
I chose to use Bluchic because their templates are feminine, sleek and built using Elementor. I knew this would make it easy to customise and personalise.
Check out Bluchic’s free course on how to launch your dream website
One of the best things about using a Bluchic template was that after installing the template in my website, all the pages were set up and looked like the demo!
This saved me SO much time and made it very easy to add my content, images and have my website ready to publish in just a few hours.
Bluchic provides good tutorials and step-by-step instructions, but If you want to make things even easier, you can take advantage of their installation service, which means that they will install the theme for you and make it look just like the demo. Easy as that!
Here’s a link to Bluchic’s shop where you can browse all their templates.
Step 5 – Customise your website
Once your template is installed, now it is time to make it your own. Upload your copy and photographs, change colours, fonts, and add your logo.
Elementor makes it easy to add, remove, and resize sections. Have fun playing around with different sections and settings to create a look that represents your brand.
Tip: Get outside help on a budget
I am a big fan of outsourcing certain things to keep my business moving. If setting up your website on your own is going to slow you down massively, then I say bite the bullet and pay someone to help out. Only you can make the call on what is the best option for you based on your skills, budget and other commitments.
If you want to get help you can consider two options:
1- Get someone to install a template
A good compromise can be to get someone to install a template for you. You can either ask them to make it look like the demo site or ask for some specific customisations. This can save you a few hour and leave you with an excellent starting point. Once your template is live you can simply use Elementor to add your copy, images, and make any further changes.
2 – Outsource the whole build
If you don’t want to spend any time building your website, then you may want to engage someone to handle the whole process. Even if you want to outsource the whole build, you may want to consider having it built in WordPress using Elementor. This will allow you to make changes yourself in the future and not have to rely on an expert every time you need to update your site or make a small change.
A few low-cost options that you can try if you want to get outside help are:
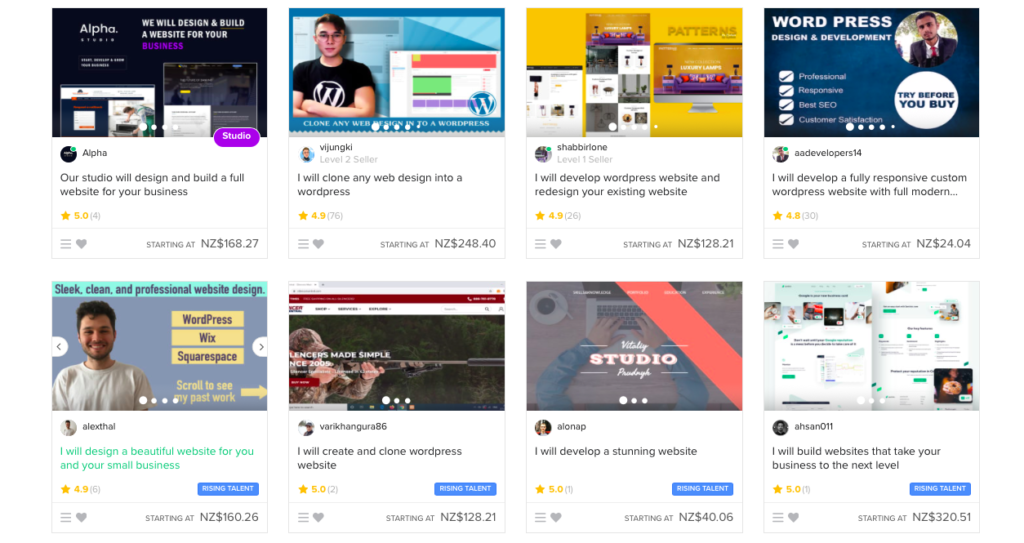
Fiverr
This is a great place to find low-cost web designers. Most of them are based overseas. To find a suitable option simply enter “web designer” on the search term and browse through the results. Take your time to choose who you are going to trust with your website. Check the freelancer’s reviews and choose one that has had several successful orders and displays 5-start feedback.
Student Job Search
You could also post an ad on Student Job Search. This is a NZ based website that allows you to hire students. I have used it many times in the past and have always had a good response.
You will need to write a job ad explaining the person that you are looking for and how much you want to pay. It is easy to post the job on their website, and the support team is very helpful if you have any questions. It is also free to use, so you have nothing to lose. Post your ad and see what applications come through. Many students are happy to offer an affordable rate as they are just getting started in an industry and trying to gain experience or build their portfolio.
Talk to your network
Do you know anyone good with computers? Ask if they would install a WordPress theme for you. Maybe you can offer a skill swap? Ask around and you may be surprised at what you may find.
Bonus step: Set up your Business email
Once you have bought your domain, you can set up your business email address. I like using Gmail for both my personal and business emails.
Using Gmail for your business address does not mean that your email address will be yourname@gmail.com. This is not a good look for professional emails. You can set it up to have your domain as an extension: e.g yourname@businessname.co.nz.
More information and set up instructions about Gmail for business.
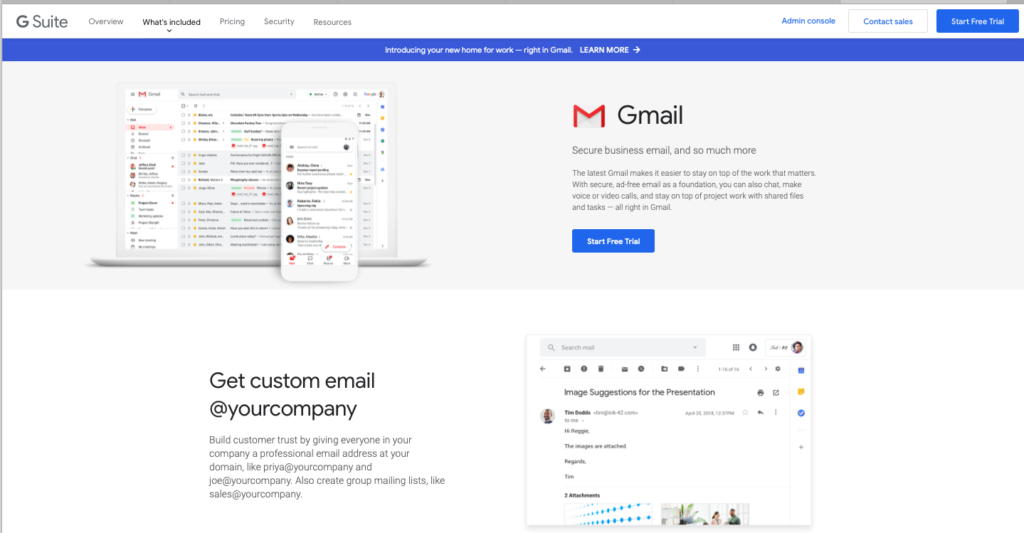
Once you have your Google Business account you will also have access to the G Suite with other handy tools such as Google Doc, Google Drive, Google Meet, Google Calendar, and so on.
More information about G Suite.
You should also be able to set up email options via your web host (such as GoDaddy or Bluehost – check what options are available through them)
Celebrate your new website!
Congratulations, now that your website is live, your business is real! Share the link with your network, post it on social media, and let everyone know!
Take a moment to celebrate and give yourself some credit. Well done you for taking action! Many people don’t ever get this far and just keep talking/dreaming about their website without taking any steps towards making it a reality
How are you going to celebrate your new website? Send me an email and let me know! I would love to see the link to the beautiful site you have created.
